Application System Administrators and Regional Security Officers
Select a topic.
Step 1
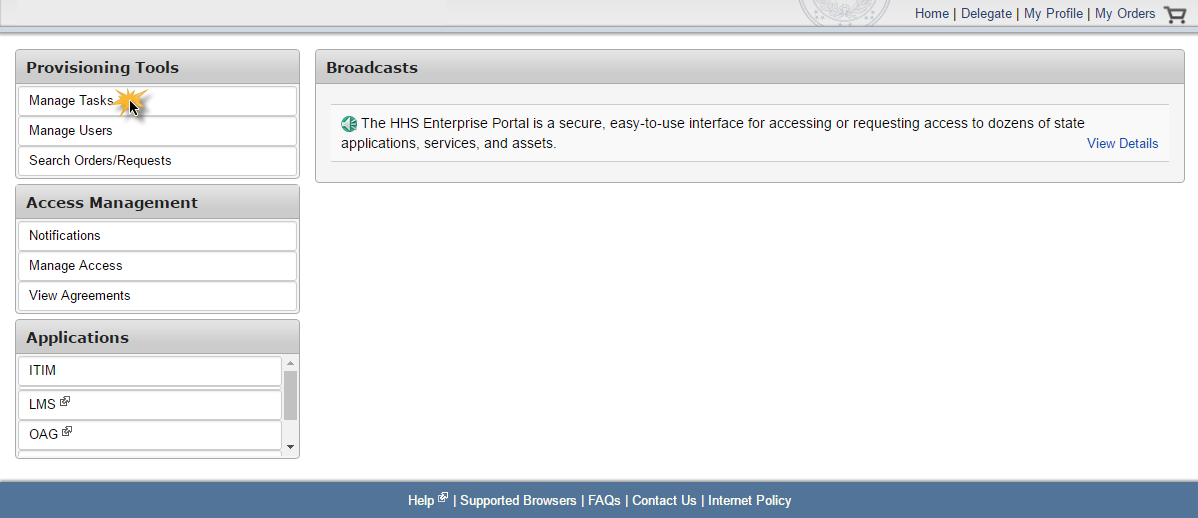
Select Manage Tasks under Provisioning Tools on the Main Menu.
Step 2
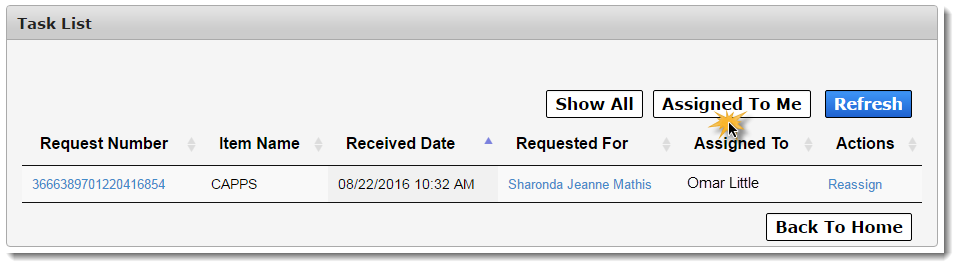
Select Assigned to Me to view all tasks assigned to you.
Step 3
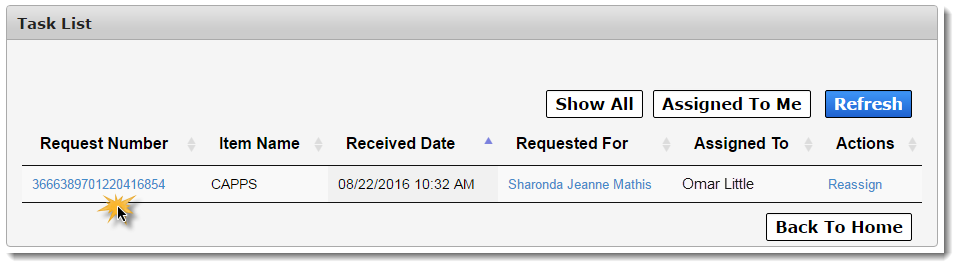
Select the Request Number in the row of the task you would like to complete.
Step 4
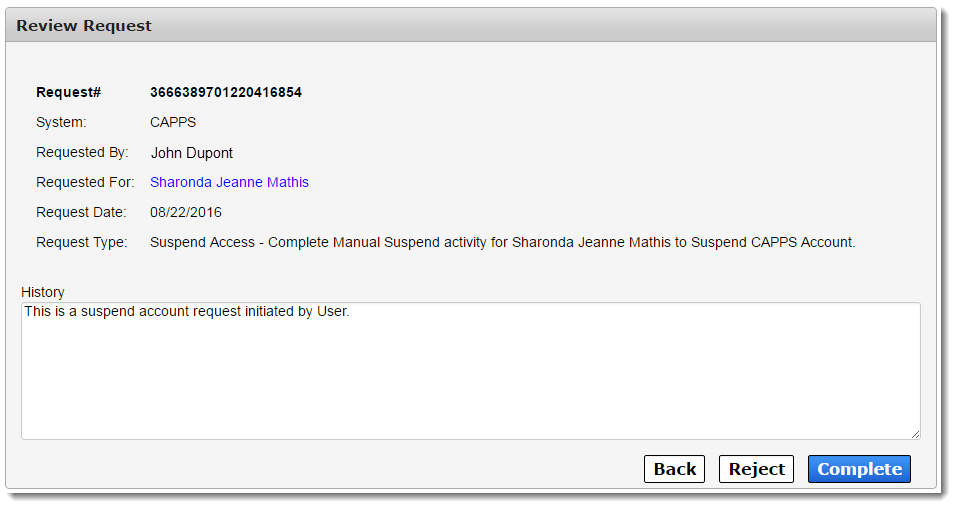
On the Review Request page, you can:
- Select Complete to provision the access.
- Select Reject to reject the access request.
- Select Back if you are not ready to perform an action on the request.
Step 5
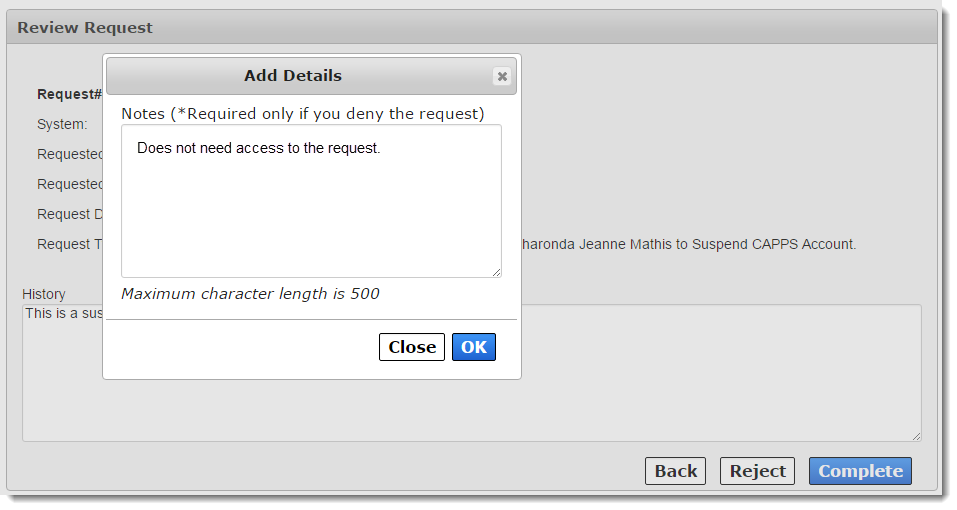
After you select Complete or Reject, a pop-up screen appears. You only need to add a note if you are rejecting the request. Click OK to complete the action.
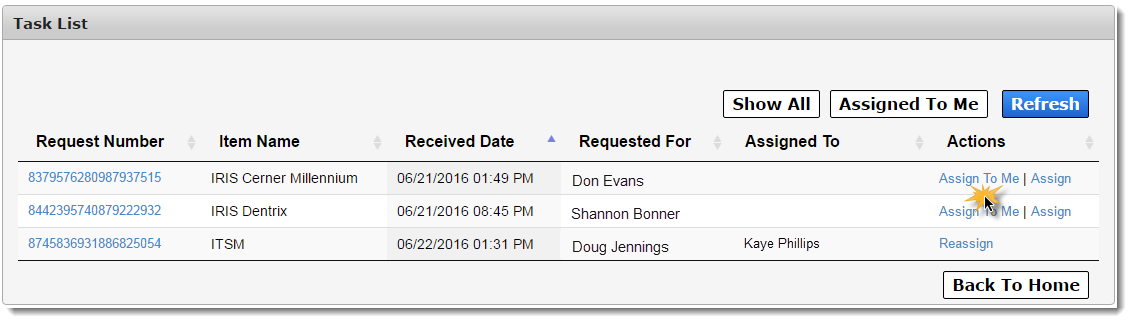
Step 1
Select Manage Tasks under Provisioning Tools on the Main Menu.
Step 2
In the row of the task that you would like to assign to yourself, select Assign to Me under Actions.
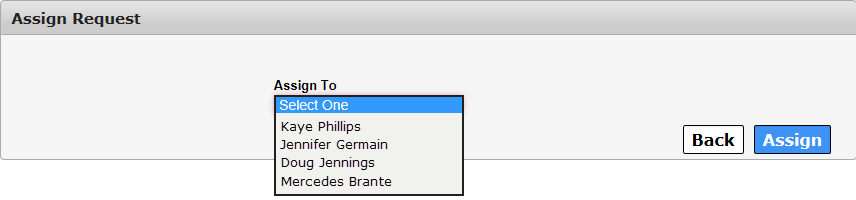
Step 1
Select Manage Tasks under Provisioning Tools on the Main Menu.
Step 2
In the row of the task that you would like to assign to someone, select Assign under Actions.
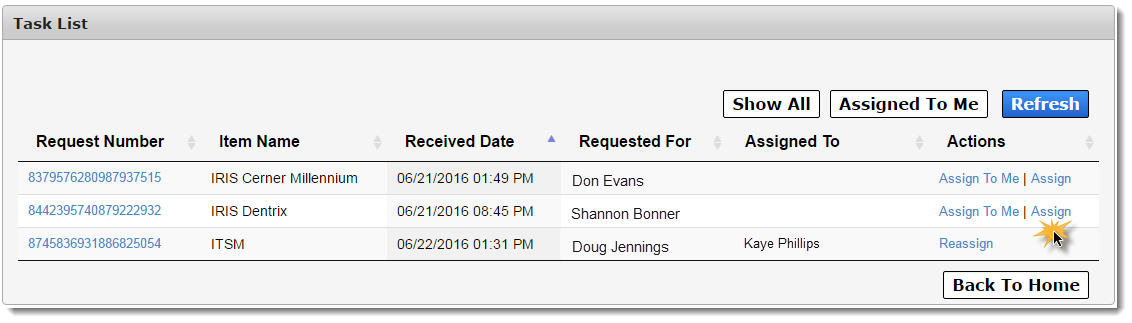
Step 3
Use the drop-down menu to select a provisioner, then select Assign.
Step 1
Select Manage Tasks under Provisioning Tools on the Main Menu.
Step 2
In the row of the task that you would like to reassign, select Reassign under Actions.
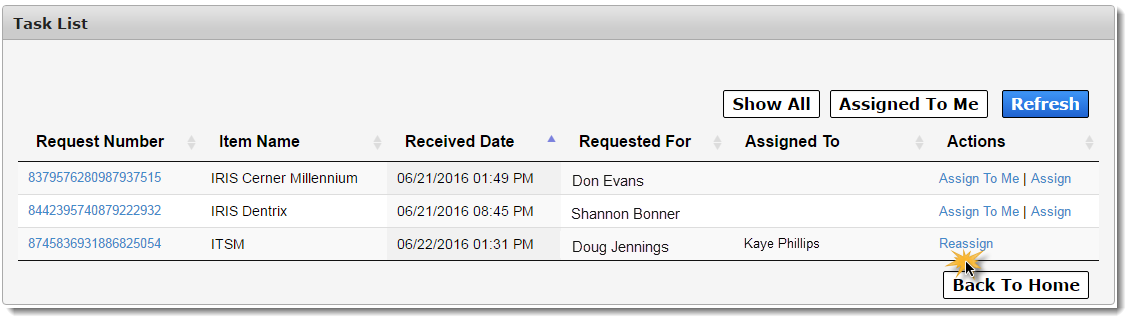
Step 3
Use the drop-down menu to select a provisioner, then select Assign.
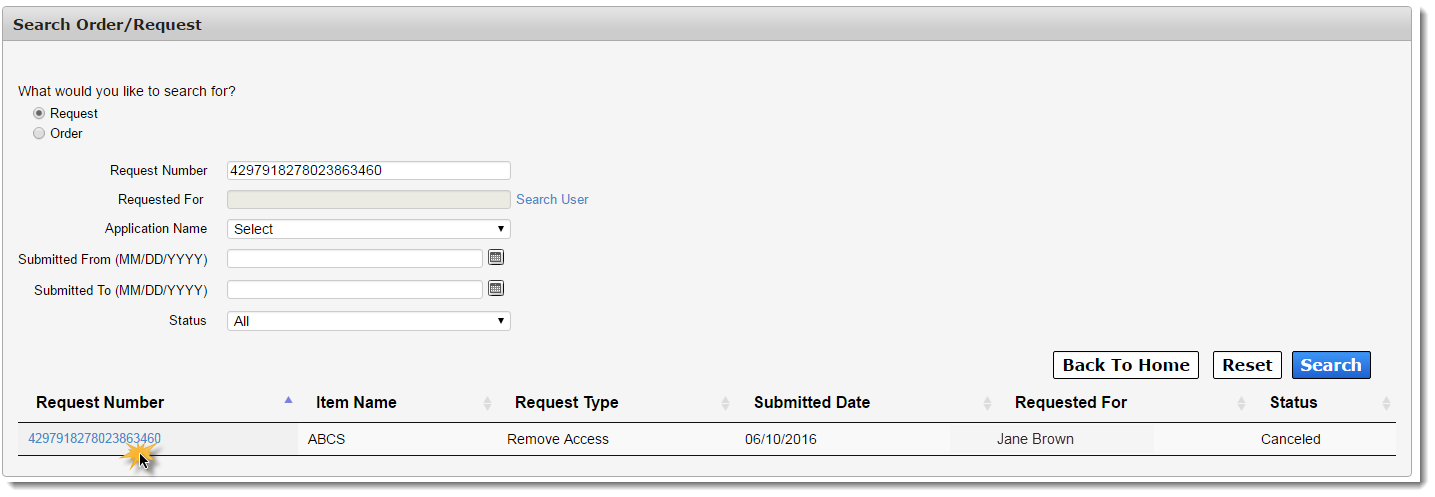
Step 1
Select Search Orders/Requests under Provisioning Tools on the Main Menu.
Step 2
To search for a request, enter search criteria in the fields provided and click Search.
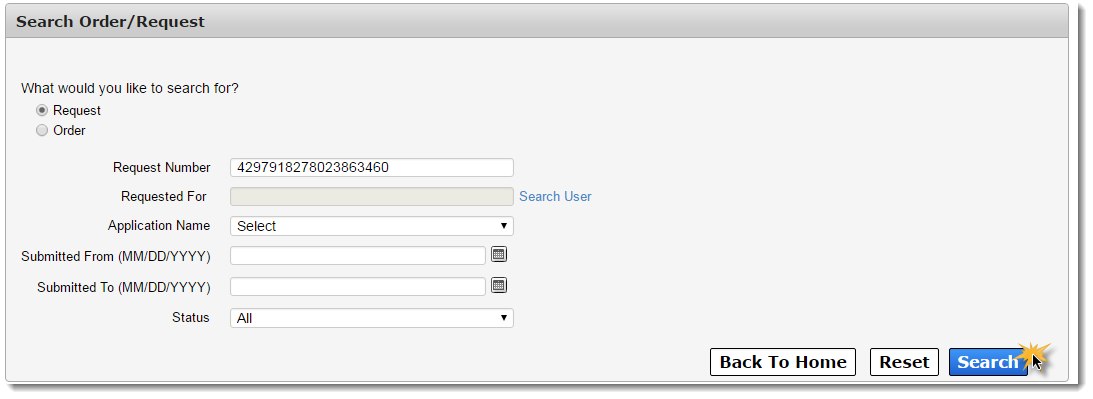
Step 3
After the search results appear, click on the request number to view its details.
Step 1
Select Search Orders/Requests under Provisioning Tools on the Main Menu.
Step 2
To search for an order, change the search selection to Order.
Step 3
Enter the order number in the field provided and click Search.
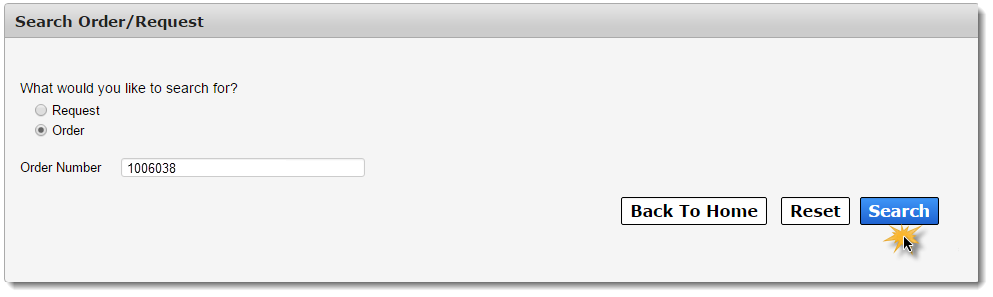
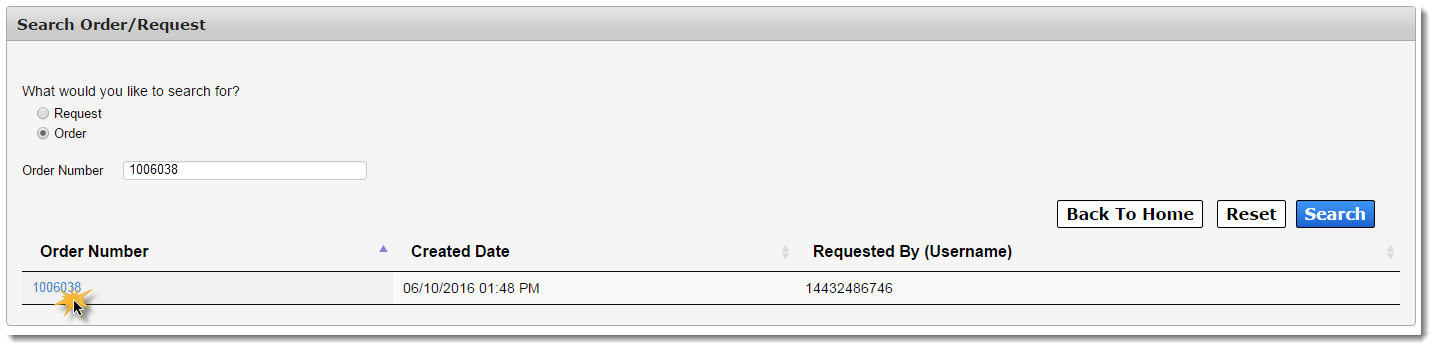
Step 4
When the search results appear, click on the order number to view the order details.
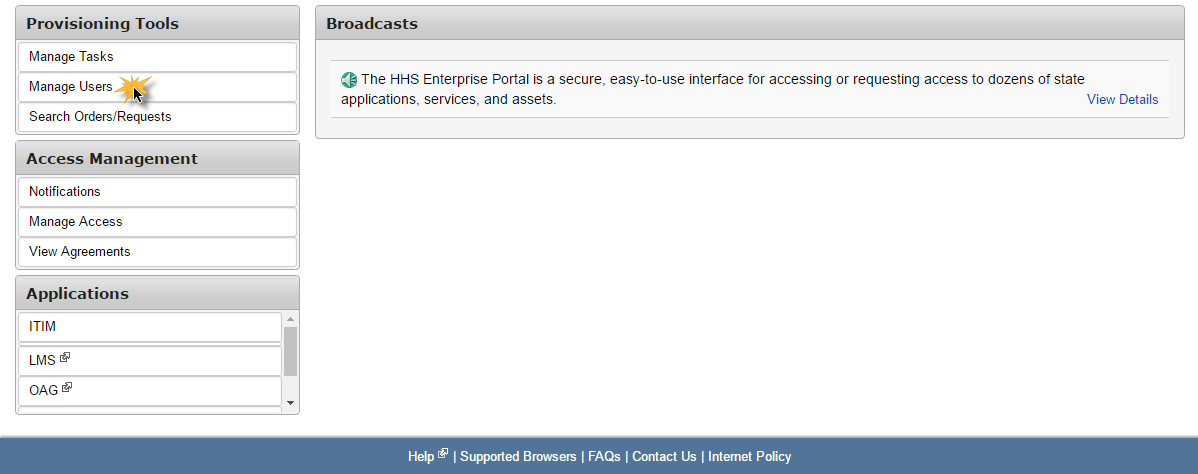
Step 1
Select Manage Users under Provisioning Tools on the Main Menu.
Step 2
Enter search criteria in the fields provided and select Search.
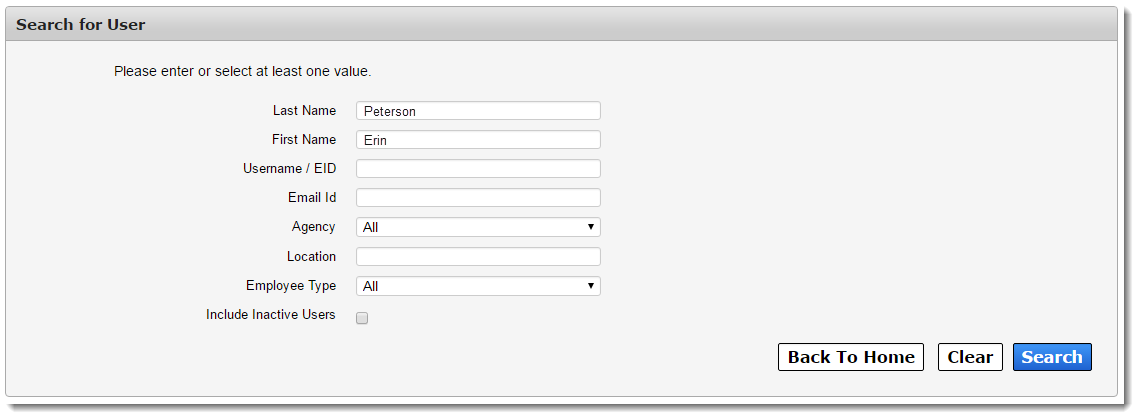
Step 3
When the search results appear, click on the last name of the user to view their information.
Step 1
On a user's User Summary page, click Add/Modify Access.
Step 2
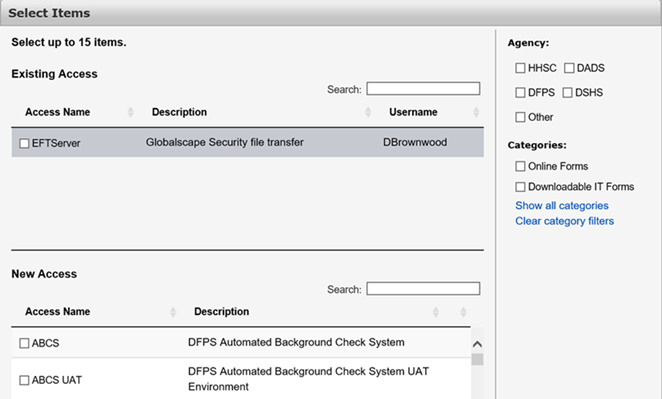
Select the access that you would like to add or modify for the user, then click Next.
Step 3
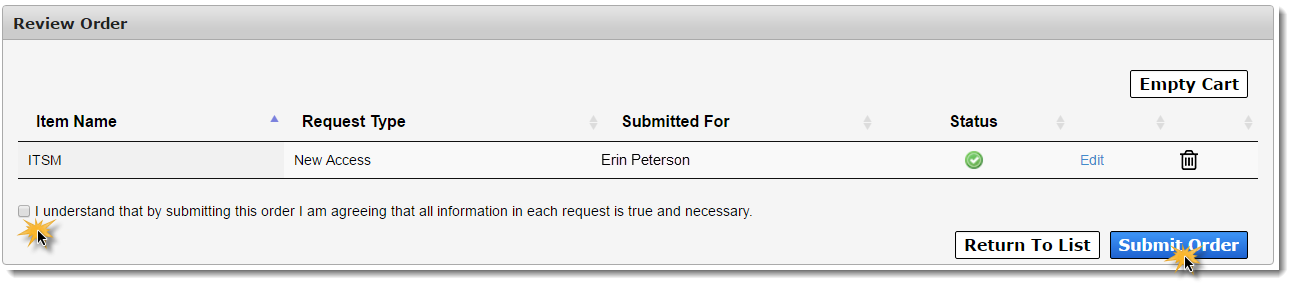
On the Review Order screen, click Information Required (if applicable) to provide additional data.

Step 4
When you have entered all of the information required, read and click beside the confirmation message, then click Submit Order.
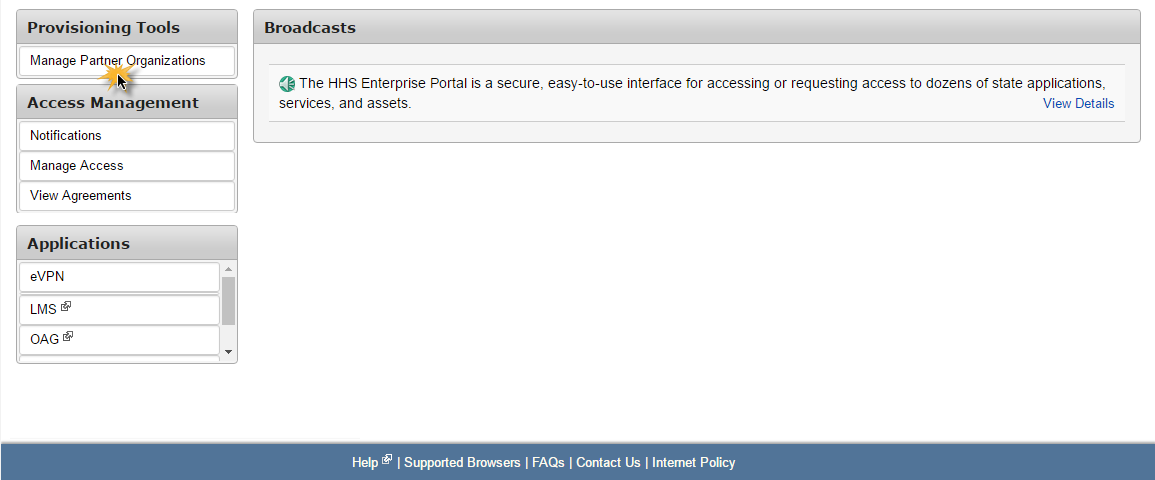
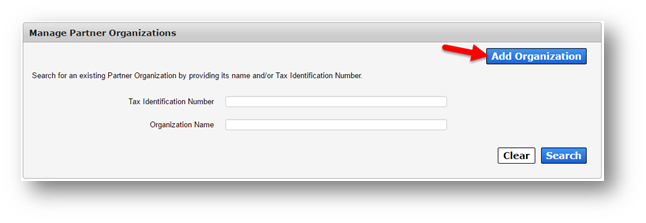
Start by clicking on the Manage Partner Organizations link under Provisioning Tools on the Main Menu.
Step 1
On the Manage Partner Organizations screen, select Add Organization.
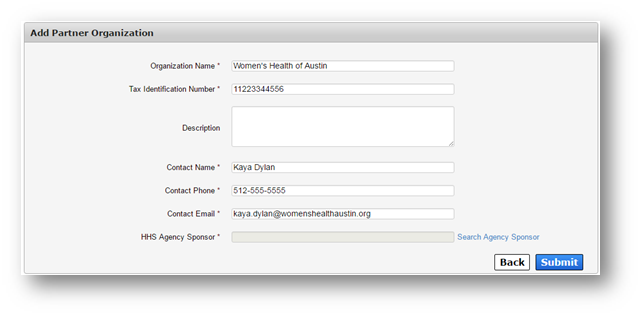
Step 2
On the Add Partner Organization screen, enter the organization's details. All fields are required except for Description.
Step 3
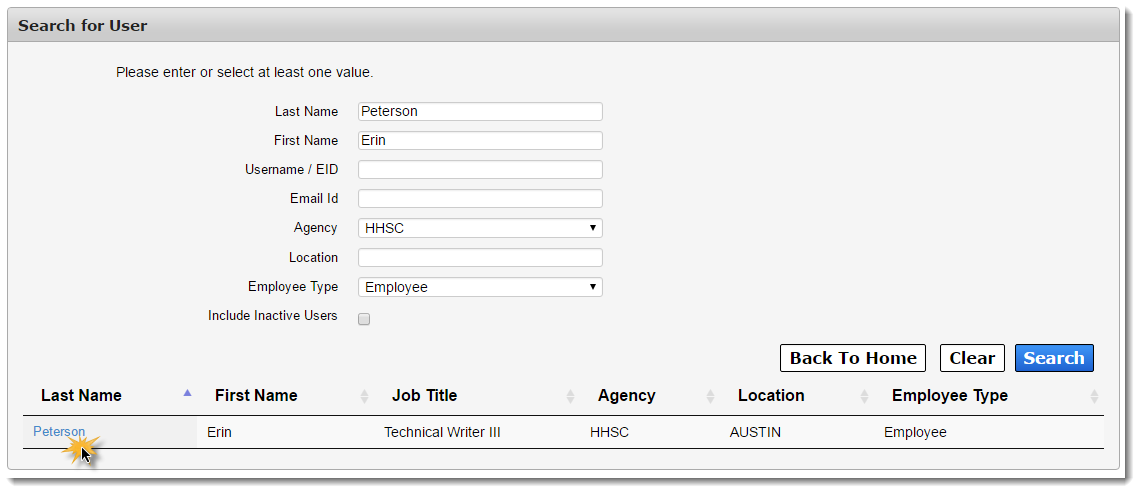
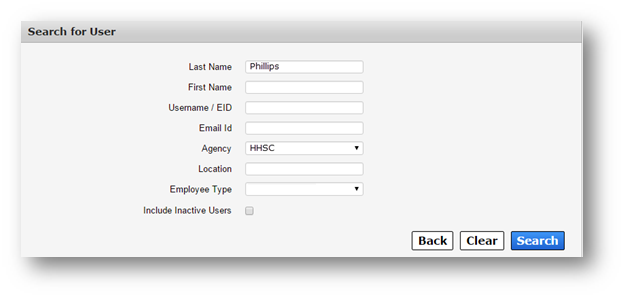
To add an agency sponsor:
- Select the Search Agency Sponsor lookup beside HHS Agency Sponsor.
- On the Search for User screen, enter information in at least one field and select Search.
- Search results appear at the bottom of the page. Select the last name of the user to assign them as the HHS Agency Sponsor.
Step 4
Click Submit on the Add Partner Organization screen to complete the process. The organization is now added to the system.
Search for a Partner Organization
On the Manage Partner Organizations screen, enter the organization's Tax Identification Number and/or the name in the fields provided, then select Search. Search results appear at the bottom of the screen.

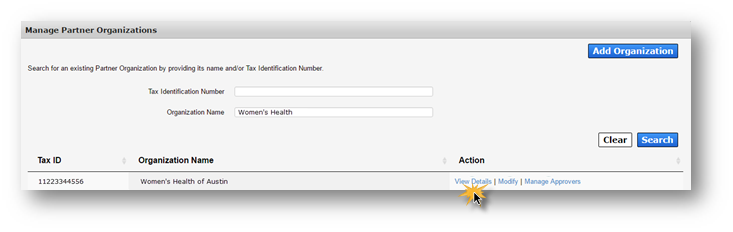
Step 1
On the Manage Partner Organizations screen, enter the organization's Tax Identification Number and/or the name in the fields provided, then select Search.
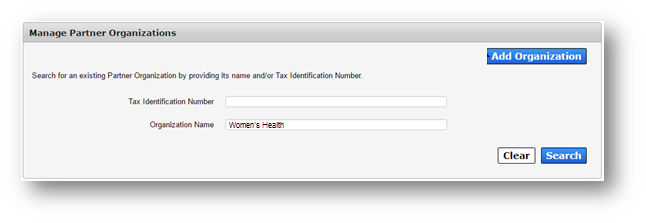
Step 2
When the search results appear, click View Details inside the partner organization's row.
Step 1
On the Manage Partner Organizations screen, enter the organization's Tax Identification Number and/or the name in the fields provided, then select Search.
Step 2
When the search results appear, click Modify inside the partner organization's row, which opens the Modify Partner Organization screen.

Step 3
Make the desired changes and click Submit.
You can manage partner organization approvers in one of two ways:
- Click the Manage Approvers link in the organization's row on the Manage Partner Organizations screen.
- Click Manage Approvers on the Modify Partner Organization screen.
Both actions take you to the Manage Organization Approvers screen.
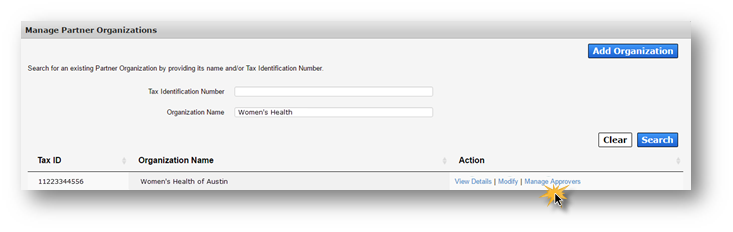
Step 1
On the Manage Partner Organizations screen, enter the organization's Tax Identification Number and/or the name in the fields provided, then select Search. Search results appear at the bottom of the screen.
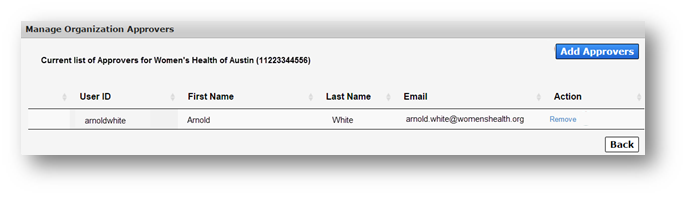
Step 2
Click Manage Approvers in the row of the partner organization.
Step 3
On the Manage Organization Approvers screen, click Remove in the row of the approver that you want to approve.
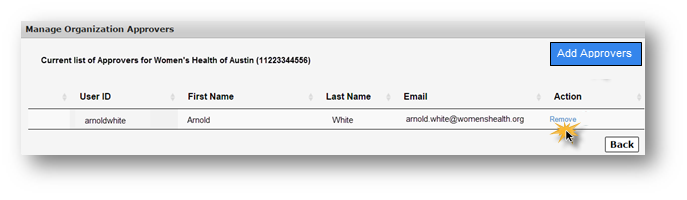
Step 1
On the Manage Partner Organizations screen, enter the organization's Tax Identification Number and/or the name in the fields provided, then select Search. Search results appear at the bottom of the screen.
Step 2
Click Manage Approvers in the row of the partner organization.
Step 3
Click Add Approvers on the Manage Organization Approvers screen, which opens the Add Organization Approver screen.

Step 4
Search for an approver using at least one of the search criteria and click Search.
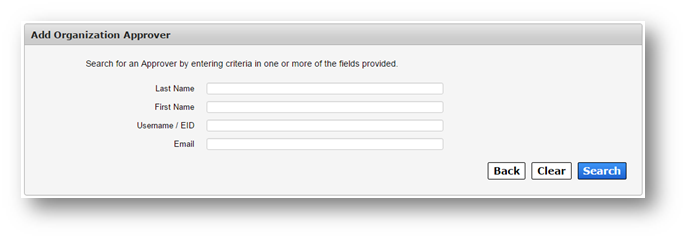
Step 5
When the search results appear, click Add as Approver in the user's row to finalize the action.
The HHS Enterprise Portal allows you to delegate tasks to your staff members, but what does that really mean?
As a Supervisor, you probably receive a multitude of access requests through the portal, all which require attention within a designated period. When you do not perform actions on these requests, the request is canceled, and the requestor must request the access again, which can be time-consuming (not to mention, make you unpopular among your team).
The portal's delegation feature helps you circumvent that problem by allowing you to delegate a staff member to perform your tasks during periods when you are unavailable.
Before you assign a delegate, however, keep in mind these basic guidelines:
- Assigning a delegate means all requests customarily sent to you will instead be forwarded to the delegate during a defined time frame.
- Requests submitted before the start date/time do not transfer to the delegate.
- Requests forwarded to the delegate during the delegation period will remain assigned to the delegate until the requests are completed, rejected, or expired.
- Delegates can only approve or deny requests; they cannot initiate requests on your behalf.
- As the delegator, you are responsible for approvals made by the delegate.
Furthermore, the delegation periods last up to 180 days. To extend the date passed the 180-day mark, change the end date after the delegation period has started.
A list of current delegates and their delegation periods are shown on the Manage Delegation screen.

To access this screen, select the Delegate link on the top right of any page in the portal, or click Manage Staff under Staff Management on the Main Menu, then select the Delegation Schedule button or the Delegate link in the row of the user that you want assign as a delegate.
Select Show All.

Select Cancel under Actions in the row of the assignment that you wish to cancel.
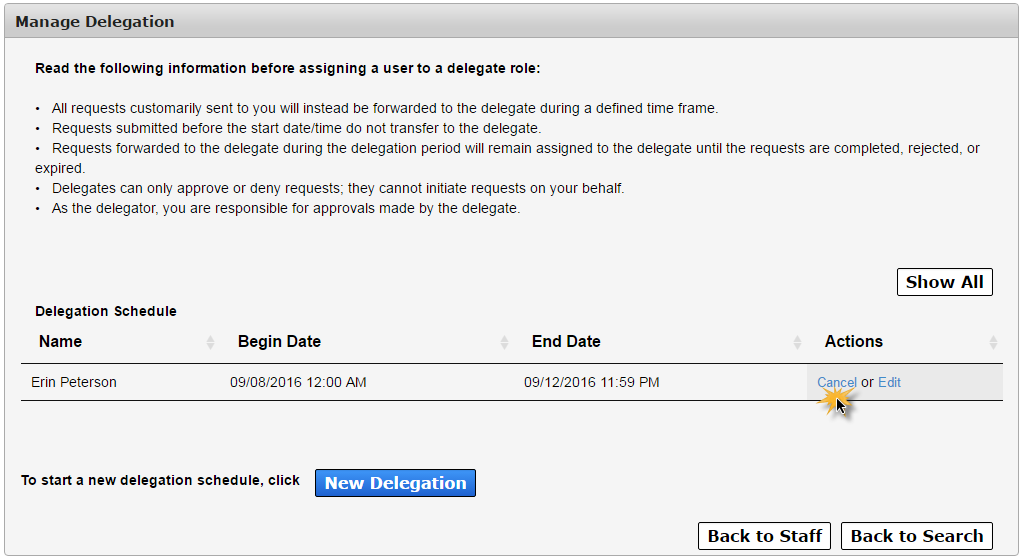
Select Edit under Actions in the row of the assignment that you wish to edit. This action opens the Delegation Details screen, where you can make adjustments.
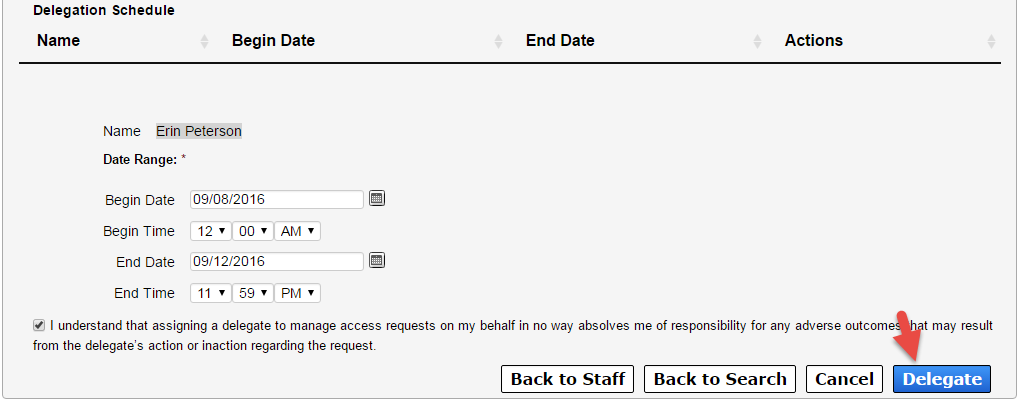
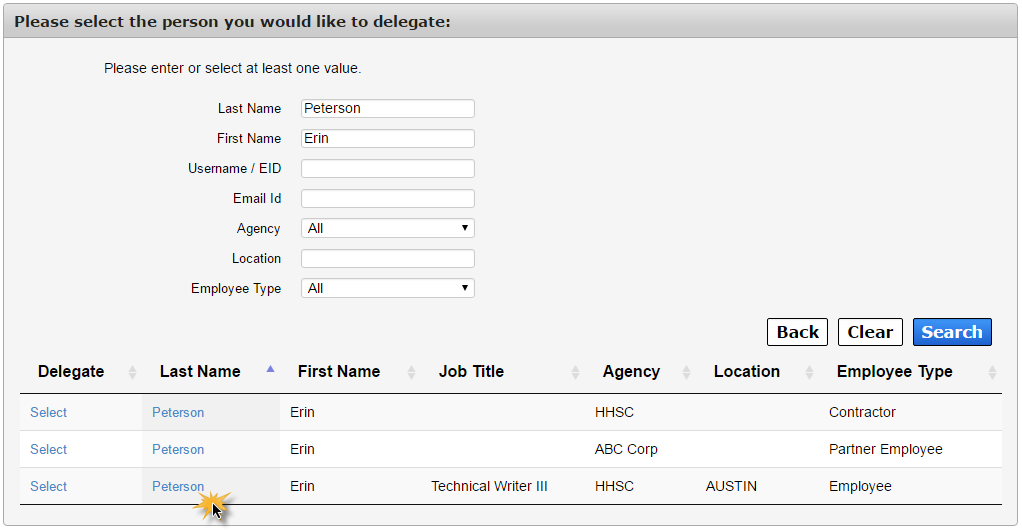
Step 1
Select the New Delegation button.
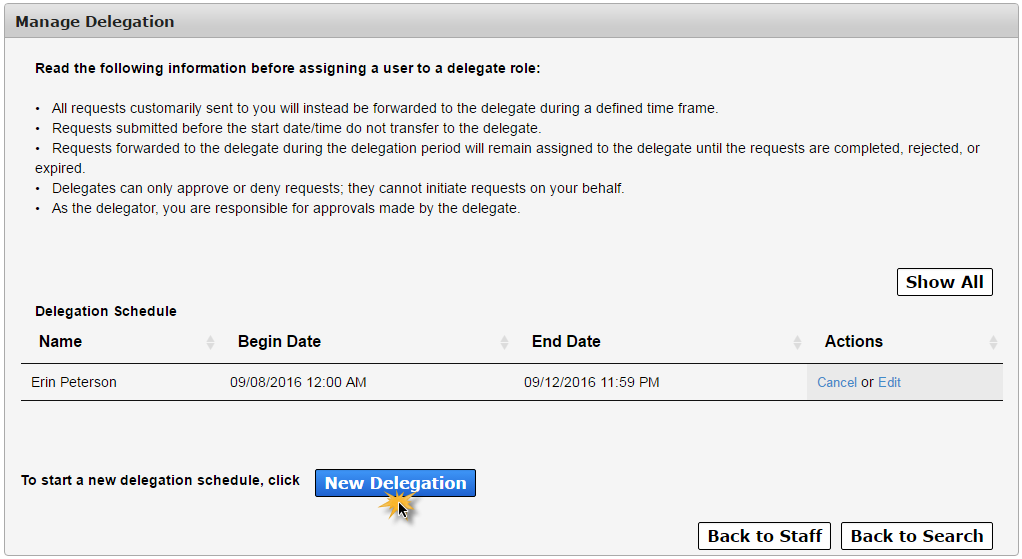
This actions opens the Delegate Search screen.
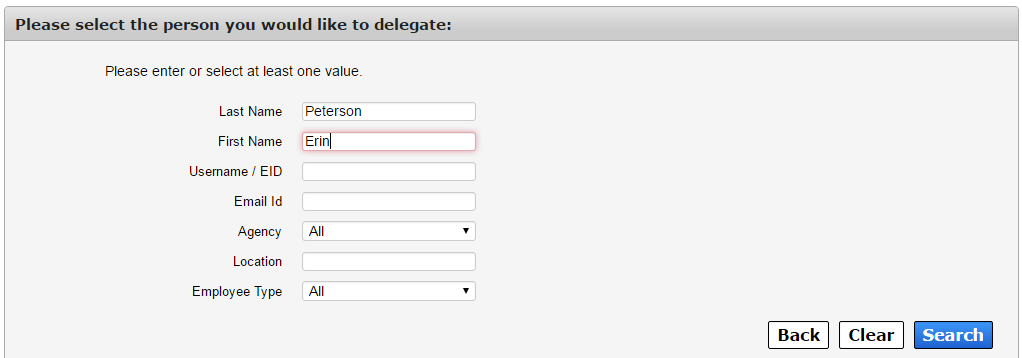
Step 2
Add search criteria in the fields provided. Select Search when you are ready.
Step 3
A list of search results will appear. Select the delegate’s last name to view their information, confirming you have found the correct delegate. Click Select in their row to begin the delegation assignment process.
Step 4
Add the start/end dates and times in the fields provided.
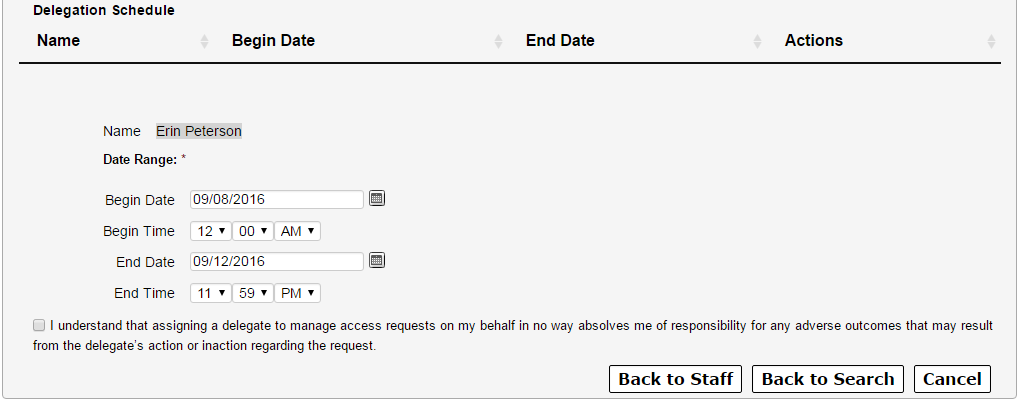
Step 5
Review the agreement and check beside it to agree to its terms. The Delegate button will not appear and you will not be able to submit the form until this item has been checked.
Step 6
Select Delegate to finalize the assignment.