Identity and Access Management User's Guide
Application Security Administrator
Add Application Account
Search Access Method

Figure 1. ITIM To Do List.
1. Open a browser window and Login to ITIM.
2. On the ITIM To Do List, select the Search tab as shown in the circle at left.
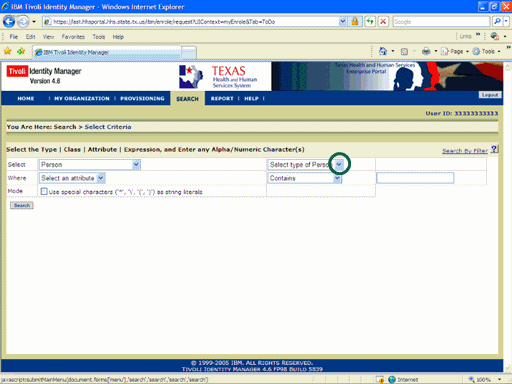
Figure 2. Search Criteria Page.
3. The Search Criteria page appears with the Person search type defaulted.
4. Expand the Select type of Person list box as shown in the circle at left.
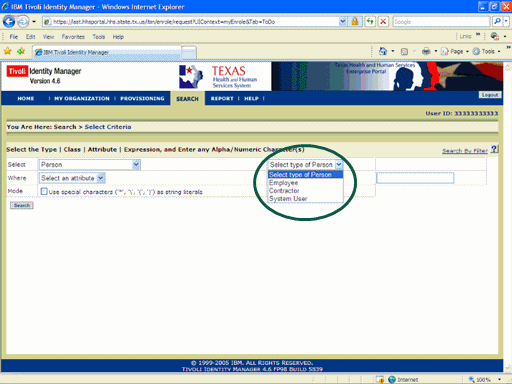
Figure 3. Search Criteria Page.
5. Select the Employee Person type as shown in the circle at left.
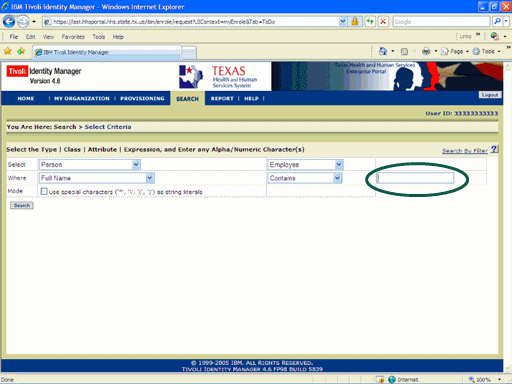
Figure 4. Search Criteria Page.
6. Select the Criteria text box then enter the Name of the Person of interest as shown in the circle at left.
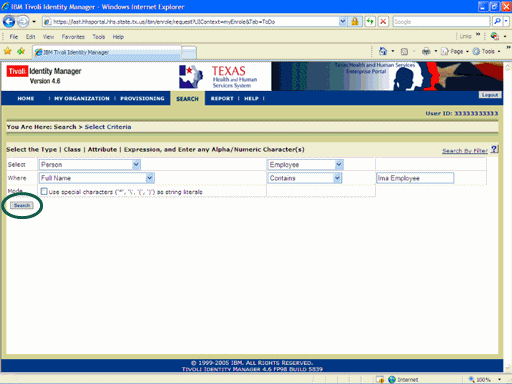
Figure 5. Search Criteria Page.
7. Select the Search button as shown in the circle at left.
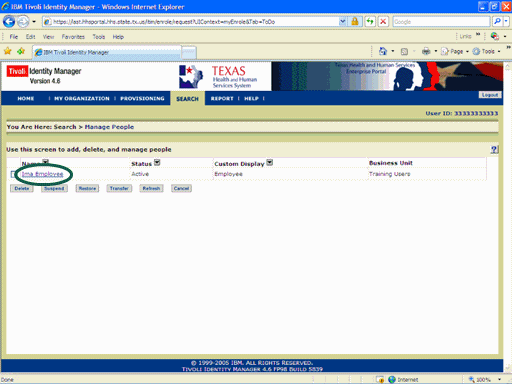
Figure 6. Search Results Page.
8. Select the Name of the Person of Interest as shown in the circle at left.
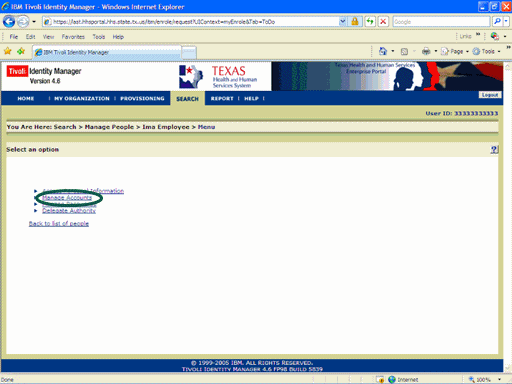
Figure 7. The Action Options Page.
9. Select the Manage Accounts link as shown in the circle at left.
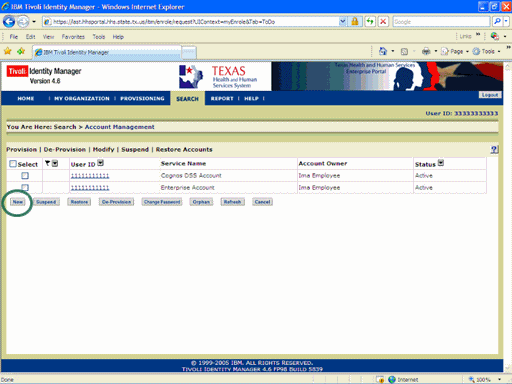
Figure 8. The Account Management Page.
10. Select the New button as shown in the circle at left.
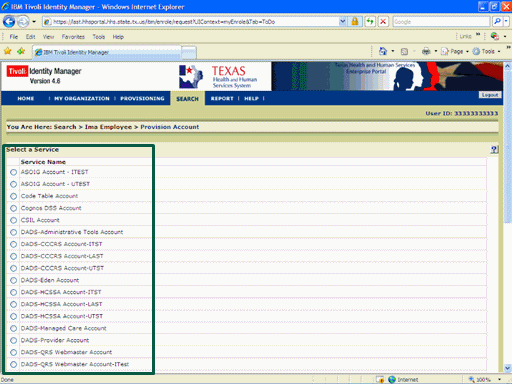
Figure 9. The Select Service Page.
11. Select the Account to be Added as shown in the rectangle at left.

Figure 10. The Select Service Page.
12. Scroll to the botton of the window as shown in the circle at left.
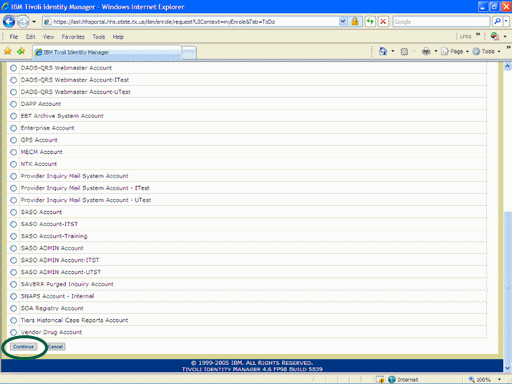
Figure 11. The Select Service Page.
13. Select the Continue button as shown in the circle at left.
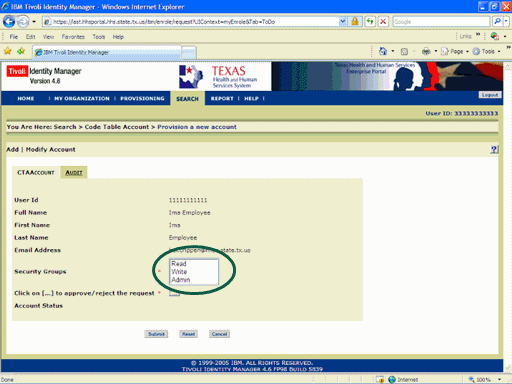
Figure 12. The Provision New Account Page.
14. Select the Security Group(s) as shown in the circle at left.
Note: The Required Item, marked with an Asterisk (*), vary with the Application being added.
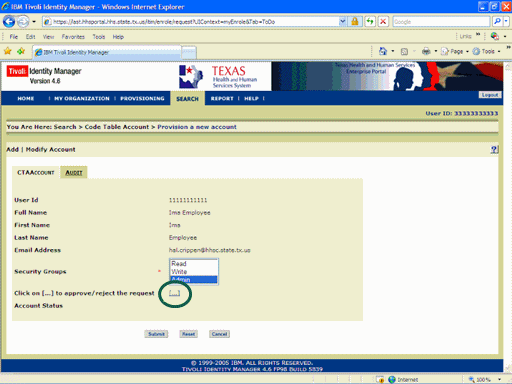
Figure 13. The Provision New Account Page.
15. Select the Approve/Reject [...] link as shown in the circle at left.
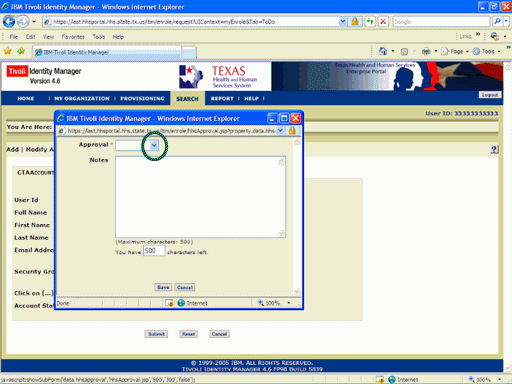
Figure 14. The Request Disposition Window.
16. Expand the Approval list box as shown in the circle at left.

Figure 15. The Request Disposition Window.
17. Select the Approved item as shown in the circle at left.

Figure 16. The The Request Disposition Window.
18. Select the Save button as shown in the circle at left.
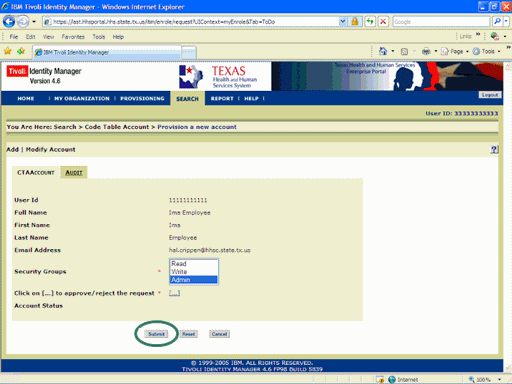
Figure 17. The Provision New Account Page.
19. Select the Submit button as shown in the circle at left.
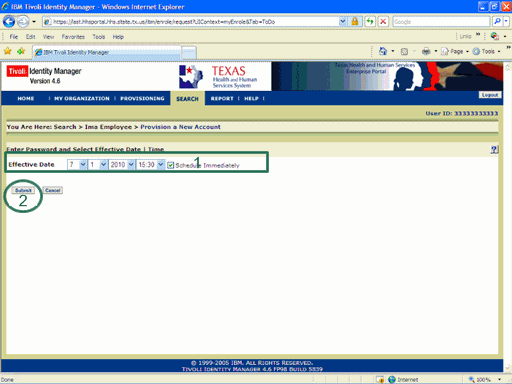
Figure 18. The Schedule Page.
20. Set the Effective Date as shown in rectangle #1 at left.
21. Select the Submit button as shown in circle #2 at left.

Figure 19. The Account Management Page.
22. The Account Management page re-appears indicating the process is complete.